Invite users to your workspace
This article is for Administrators only.
Overview
- Create Administrators and Operators in your workspace. The number of users you can create is defined in the pricing plan your organization subscribed to.
- Registering a new Administrator impacts the admin rule defined in your account. For this reason, you can only invite one Administrator at a time. The user's registration must be approved before another one can be created.
Before you start
- Adding a new user to your workspace is a multistep process. Make sure you understand it fully before getting started: Invite new users to your workspace .
- Make sure you understand the different User roles and permissions .
- Invite a user previously revoked: Users are associated to a unique User ID generated on their device when initializing it. It allows associating users to their device when they connect and work on the platform. When revoking a user, their User ID is permanently blocked on your workspace. To solve this, the user must reset and initialize their device again to generate a new User ID. You can then invite them again following the process described in the Invite users to your workspace section.
You'll be prevented from adding a new Administrator if any of the following requests have the Pending status:
- Invite Administrator
- Revoke Administrator
- Edit admin rule
Process all pending requests before creating a new Administrator. They will all fail once the Administrator request is approved as the number of approvals required from the admin rule has been modified.
Instructions
Step 1. Select the role of the user
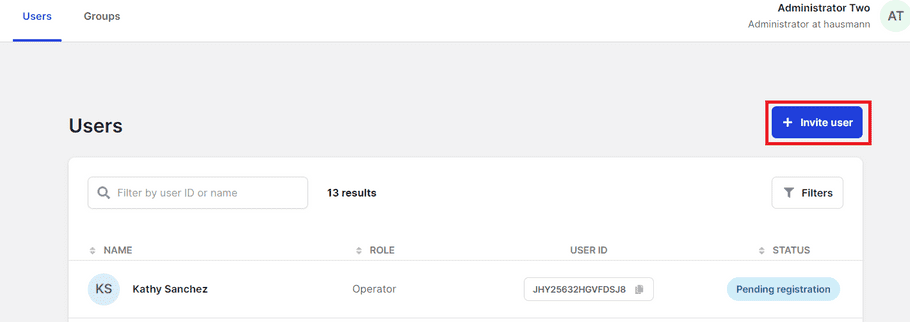
- Click Users on the left panel.
- Click =+ Invite user .
- Select the Administrator or Operator box.
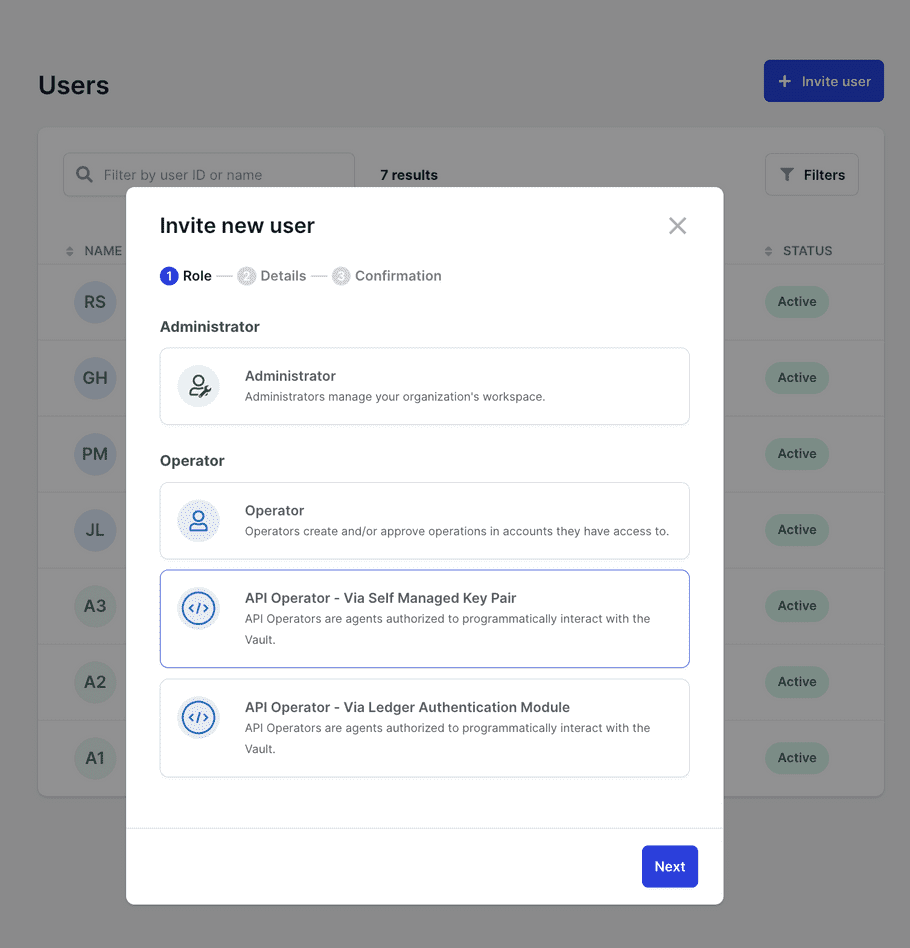
The API Operator role can only be used when working with the Ledger Vault's API. For more information, see Overview of the Ledger Vault's API.
- Click Next .
Step 2. Enter the user's User ID
- Enter a unique Username .
Make sure you're satisfied with this name as it can't be edited once the user is created. In case of an error, this can be corrected before the user registers: Edit a user invitation.
- Enter the User ID communicated by the new user.
Make sure you've entered the correct user ID. The new user won't be able to register if the user ID you've entered doesn't match the one on their device. If you've made an error, this can be corrected. For more information, see Edit a user invitation.
User IDs are unique, and the same ID can't be used for multiple users, whether they're active or revoked.
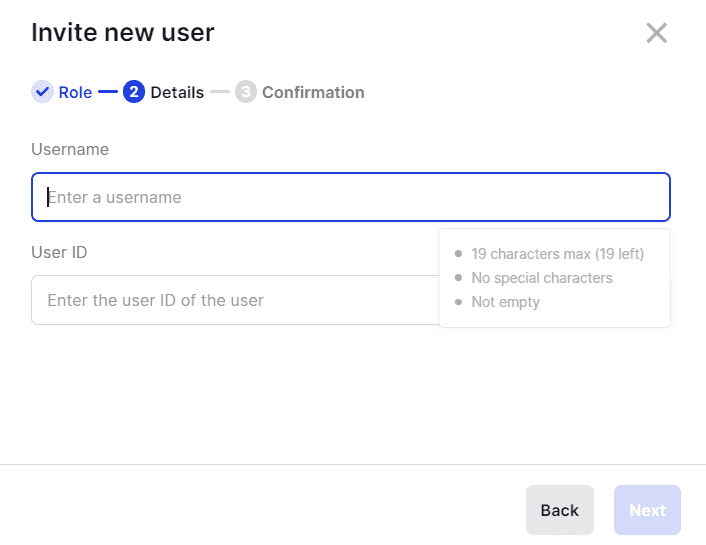
- Click Next.
Step 3. Confirm the creation of the request on your device
- Carefully review the information displayed on-screen.
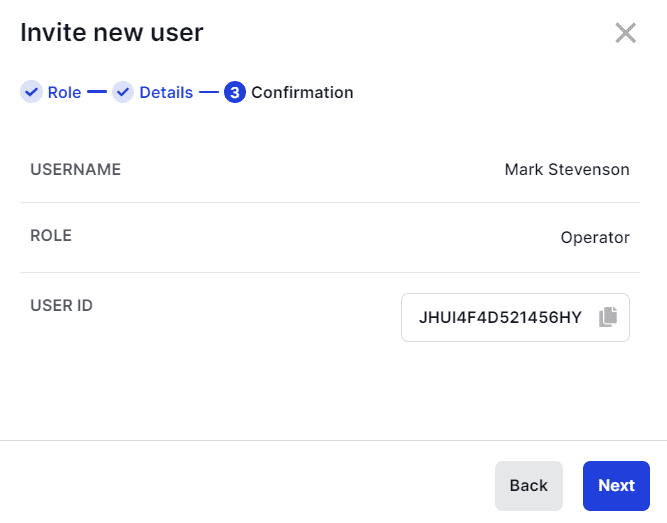
- Click Next .
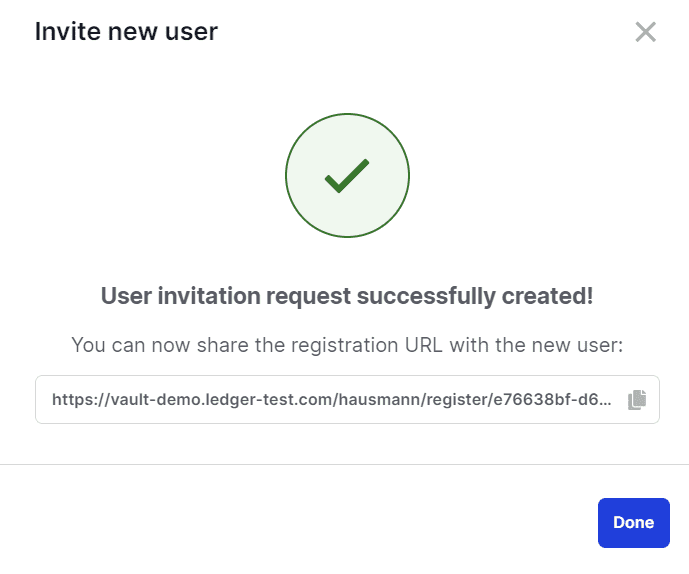
-
Click the copy icon
 to copy the invitation URL.
Results
You've generated a unique URL on which the user must register. Communicate this URL to the user using your organization's preferred communication channel.
What's next?
The new user has 7 days to register before the URL expires, in which case a new invitation will have to be created.
You can track the status of the invitation and edit it from the dashboard. For more information see, Track the status of a request and Edit a user invitation. The invitation request will have the Pending registration status until the user registers.
Once the new user has registered, a Create user request is automatically created and submitted to Administrators for approval. The user creation is finalized once the necessary number of approvals is collected from Administrators.
See also
© Copyright 2023 Ledger – All Rights Reserved – View Disclaimer - Cookie Policy