Connect Exchange Account
This article is for Administrators only.
This feature is currently available on demand. Please contact your Technical Account Manager for more information
Overview
- Connect an External Exchange account to your workspace.
- Define comprehensive transaction rules.
Prerequisites
- Make sure you have an admin access to the exchange, or access to a valid exchange API Key.
- Your Personal Security Device must be connected to your computer, switched on, and the Ledger Vault app opened.
Instructions
Step 1. Connect a new Exchange Account
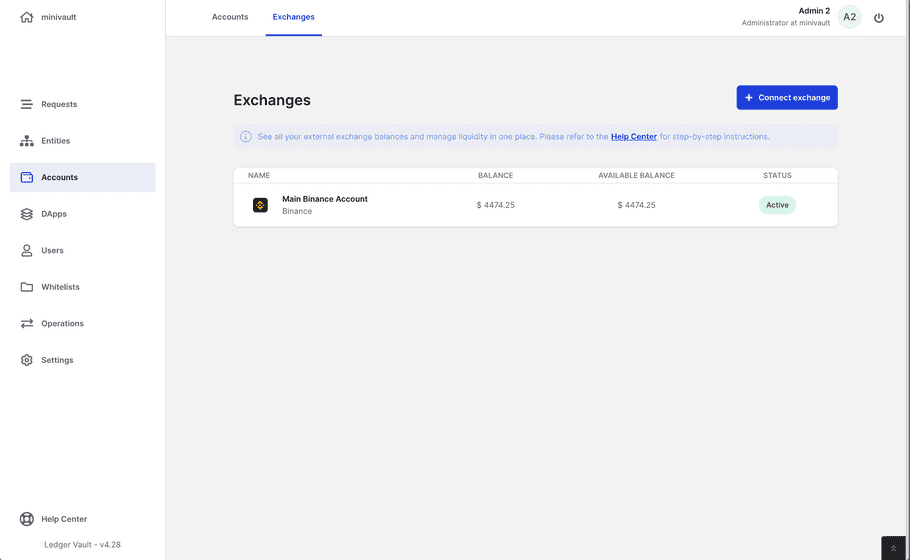
- Click Accounts on the left panel.
- Click Exchanges on the top tab.
- Click + Connect exchange in the top right corner.
- Select an exchange from the drop-down.
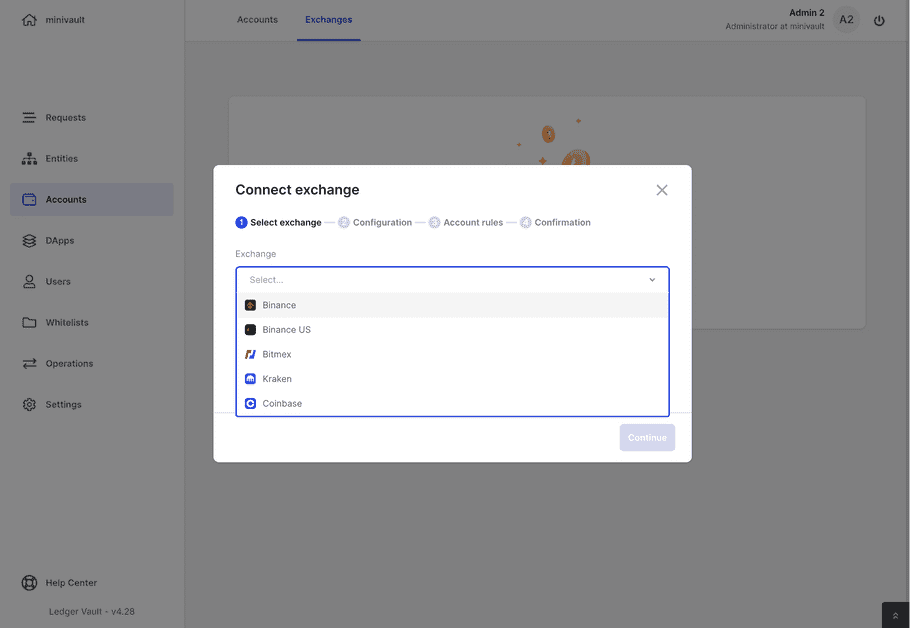
- Click Continue .
Step 2. Set exchange account credentials
Please note that this step is highly sensitive, make sure you create the API key with the right set of access and you have proper withdrawal whitelist in place.
- Enter a Name for the account.
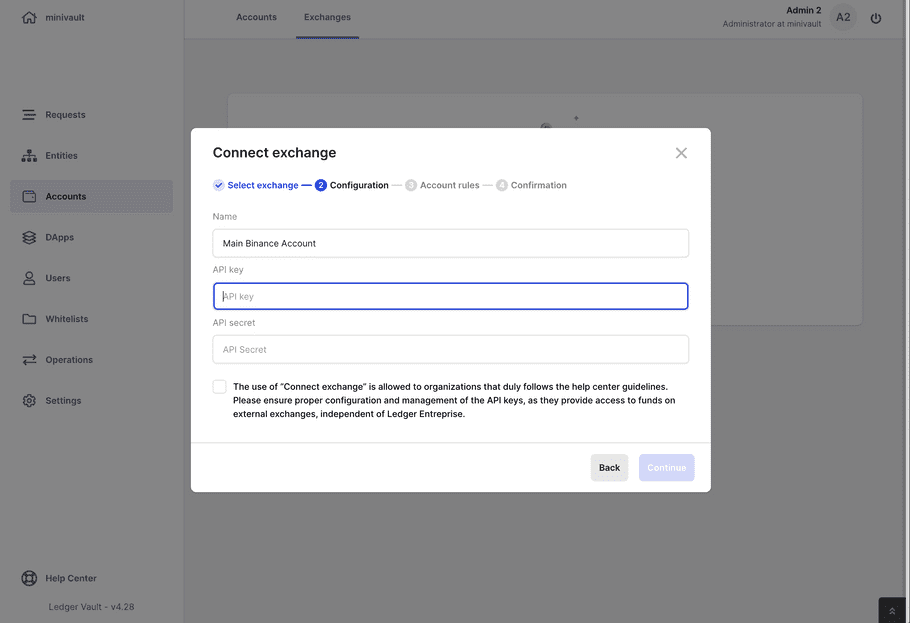
-
Enter the your API exchange credentials.
Here is how you can create your credentials for each supported exchange:
List the following IPs in the whitelist: - 54.78.253.162 - 34.243.22.23 - 54.78.191.160 - Based on the access shared to your operators via this API key, they will access Reporting capabilities or Transfer capabilities Liquidity Management Efficiency . In case you enabler the transfer capabilities, make sure you have the right whitelist in place, your admin need to set this up in the setting section of the exchange. Each exchange is unique and security measures need to be setup before initiating this connection. If you need help don't hesitate to reach out to our team or explore the exchange documentation.
Step 3. Define the exchange account rules
Please note that the account rule on ledger enterprise exchanges accounts are software based and are not registered on the HSM. The true security of API calls are configured when creating an API key directly in the exchange settings. Please make sure you have the right withdraw address whitelist and IP whitelist setup explained in step 2.
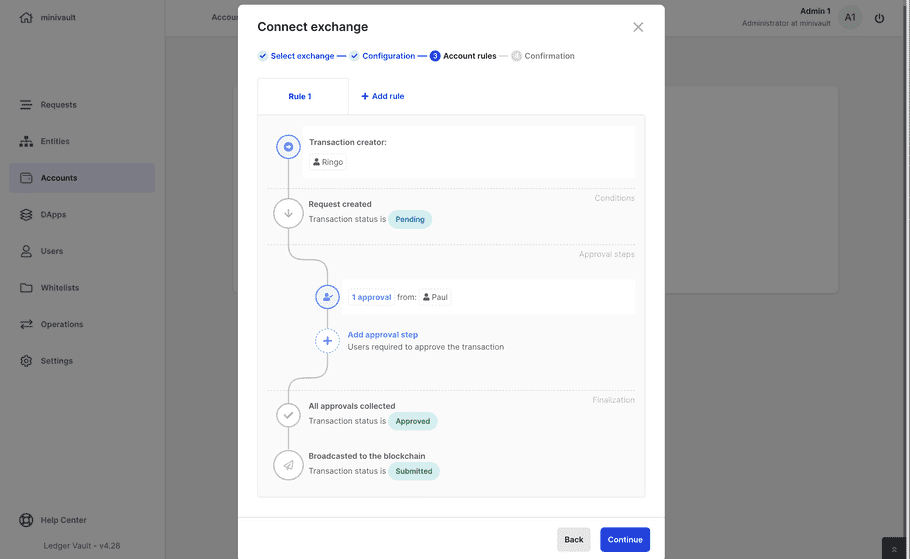
- Click Select creator to define which Operators can create transactions. You can select up to 20 Operators or a single group.
Operators and groups pending to be created, edited, or deleted aren't listed.
-
Use the approval workflow section to define which Operators must review and approve transactions created in the account. You can define up to three steps.
- Click Add approval step .
- Select up to 20 Operators or a single group.
Operators and groups pending to be created, edited, or deleted aren't listed.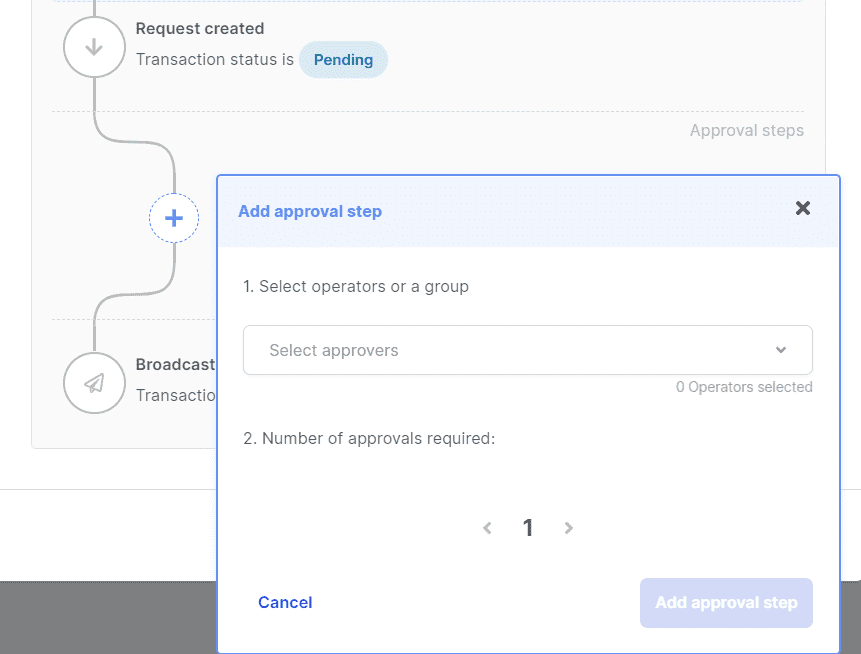
-
Click the chevrons

 to define the number of approvals required from these Operators.
- Click Add approval step .
- Click Continue .
Step 4. Confirm the exchange account connection
-
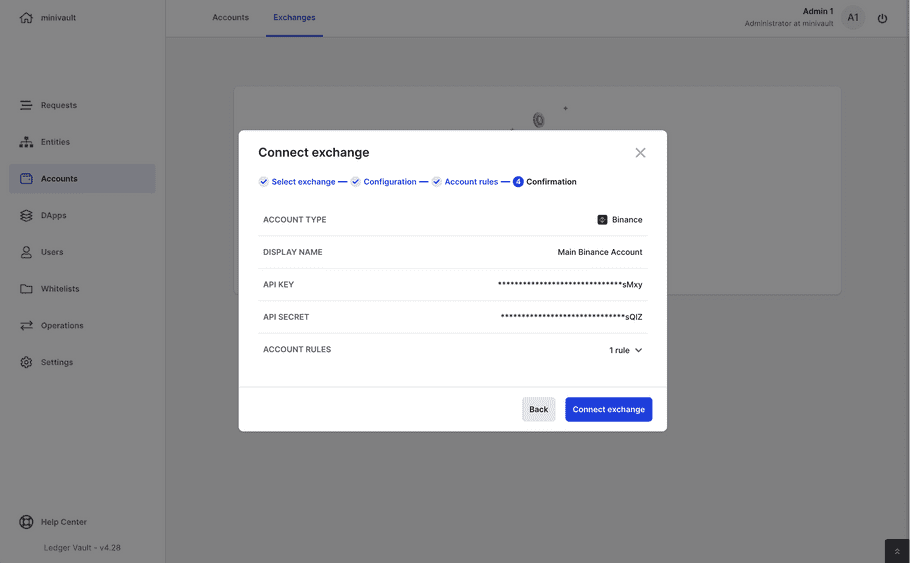
Review the configuration on last step of the modal.
-
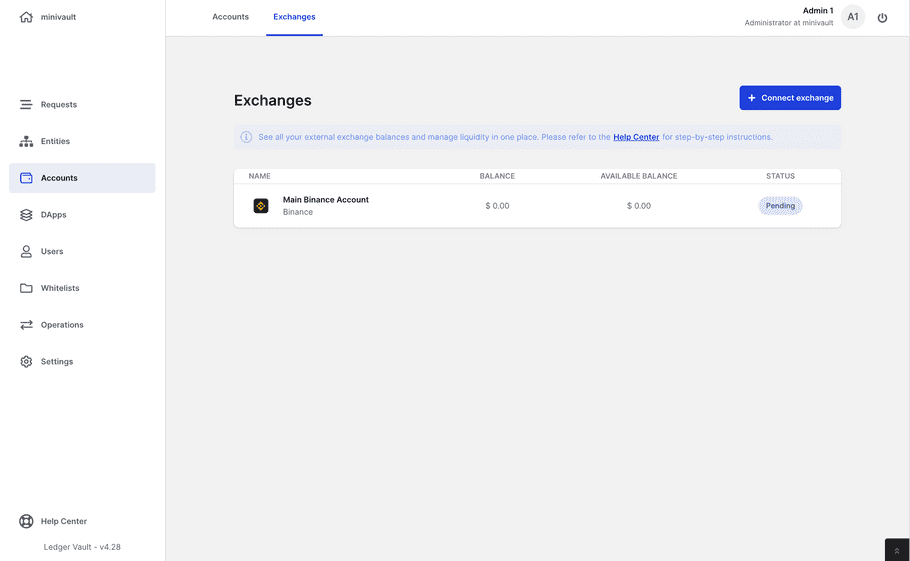
Creator Admin will see a new exchange pending approval.
-
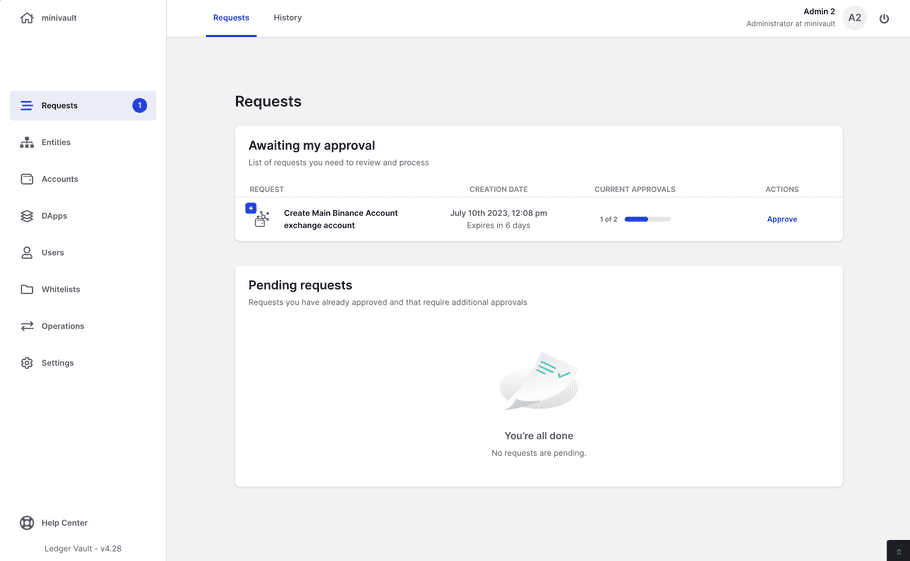
Other Admins need to review and approve the request to finish the exchange connection.
Results
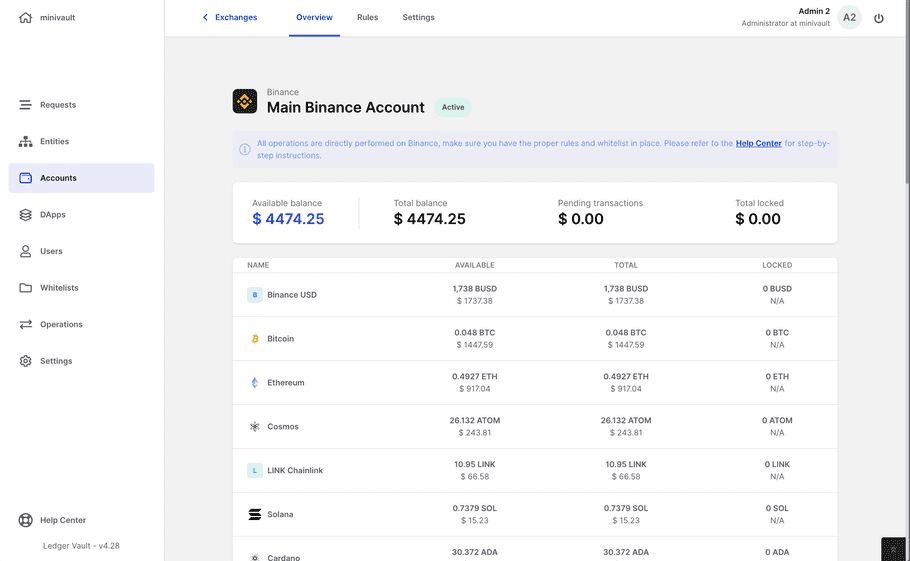
Then you will be able to manage all the the exchange accounts in one place, and connect more if needed. You are able to see the total balance in USD.

When clicking on an exchange you see the total balance on the top and see a breakdown per assets, crypto and fiat held on the exchange.
What's next?
The account will be created once the request is approved by the number of Administrators defined in the admin rule. For more information, see track the status of a request.