Activate a view-only account
This article is for Administrators only.
Overview
- Ethereum and ERC20 token accounts must be activated if the transaction rules haven't been defined.
- Once activated, Operators will be able to create transactions in the account.
Before you get started
- Learn more on Activating view-only Ethereum accounts .
- Your Personal Security Device must be connected to your computer, switched on, and the Ledger Vault app opened.
Instructions
Step 1. Select the account you want to activate
- Click Accounts on the left panel.
- Click the name of the account you want to activate. This account must have the view-only status.
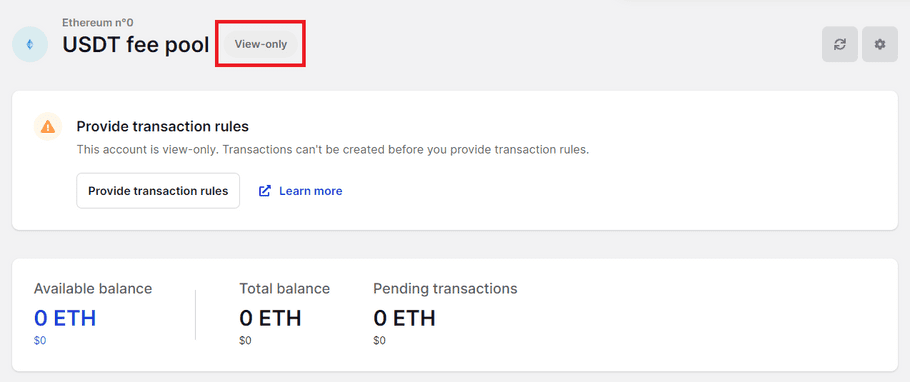
- Click Provide transaction rules at the top of the account dashboard.

Step 2. Define the transaction rules
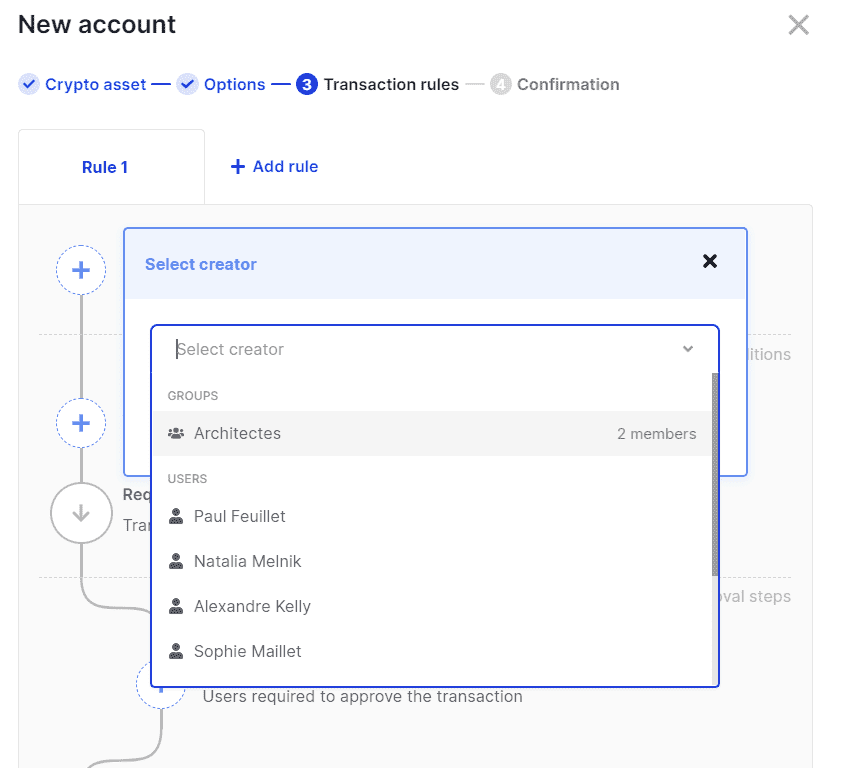
- Click Select creator to define which Operators can create transactions. You can select up to 20 Operators or a single group.
Operators and groups pending to be created, edited, or deleted aren't listed.
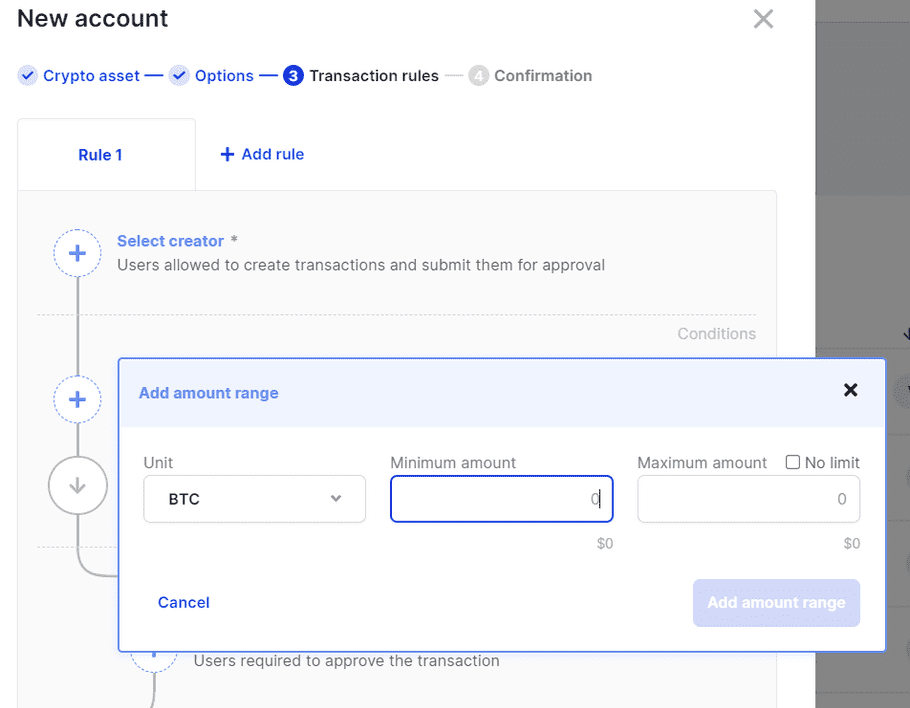
- (optional) Click Add amount range and enter a Minimum and Maximum amount . Optionally, select the No limit checkbox, if you don't want to set a maximum value. Then, click Add amount range to confirm.
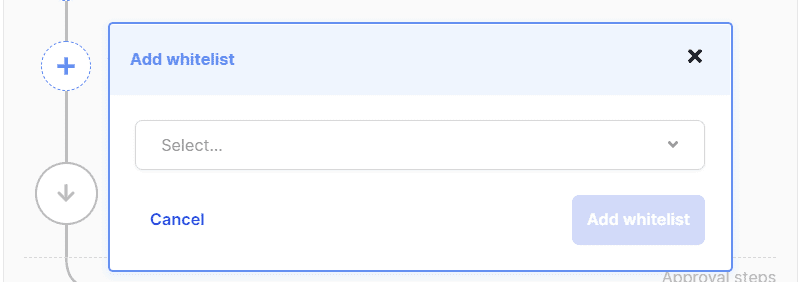
- (optional) Click Add Whitelist and select up to four whitelists from the drop-down. Then, click Add whitelist to confirm.
Only whitelist(s) that contain at least one address in the currency of the account are listed. Whitelists pending to be created, edited, or deleted aren't listed either.
-
Use the approval workflow section to define which Operators must review and approve transactions created in the account. You can define up to three steps.
- Click Add approval step .
- Select up to 20 Operators or a single group.
Operators and groups pending to be created, edited, or deleted aren't listed.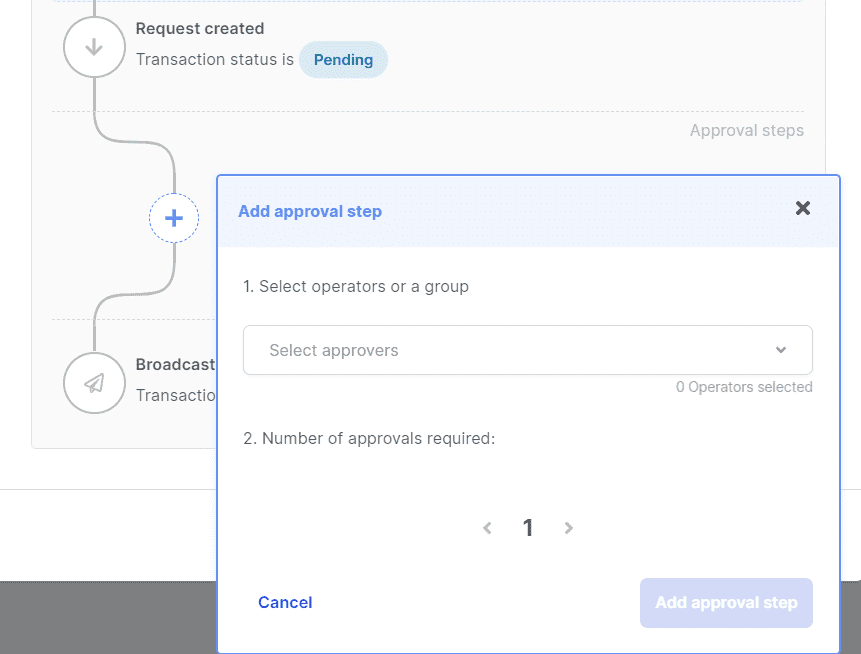
-
Click the chevrons

 to define the number of approvals required from these Operators.
- Click Add approval step .
- (optional) Click the + Add rule tab and repeat the above steps to add up to four rules.

- Drag and drop the rules tabs to arrange them in the wanted order of execution. For more information, see Accounts .
- Click Next .
Step 3. Confirm the account's edits on your device
- Click Edit account .
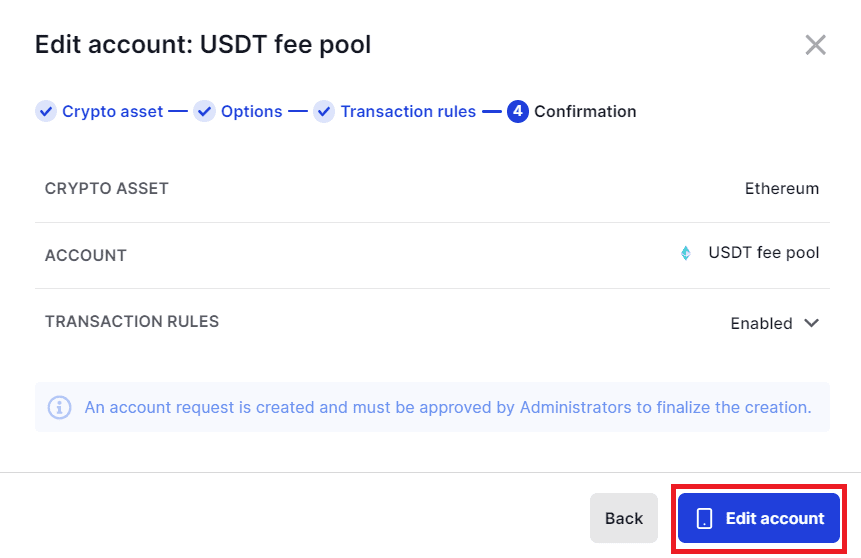
- Verify that the information displayed on your device is accurate. If it's not, either try again or contact Support .
- Tap Confirm .
- Repeat the above steps for each view-only account.
Results
An Edit account request is submitted to all Administrators.
What's next?
The account will be activated once the request has been approved by the number of Administrators defined in the admin rule. For more information, Track the status of a request. Once done, Operators will be able to create transactions in the account.