Stake ETH with Figment from your Ledger Enterprise platform
Step-by-step guide: Stake with Figment via GUI
Prerequisites
You need to be a Creator on at least one Smart Contract governance rule to have access to the Vault DApps. If not, reach out to your Administrators to request it. Note that the account you wish to stake from needs to have at least 32 ETH to be able to perform a valid stake.
In the following guide, we will assume that you are an Operator in the Creator step of the Smart Contract rule of the Goerli "Staking" account (which is funded with enough tETH).
Initiate a new staking position
- To start staking with Figment from your Ledger Vault, head to your Staking account, and click on the WalletConnect logo . You will be redirected to the WalletConnect application so that you can connect your Staking account to Figment's staking interface.
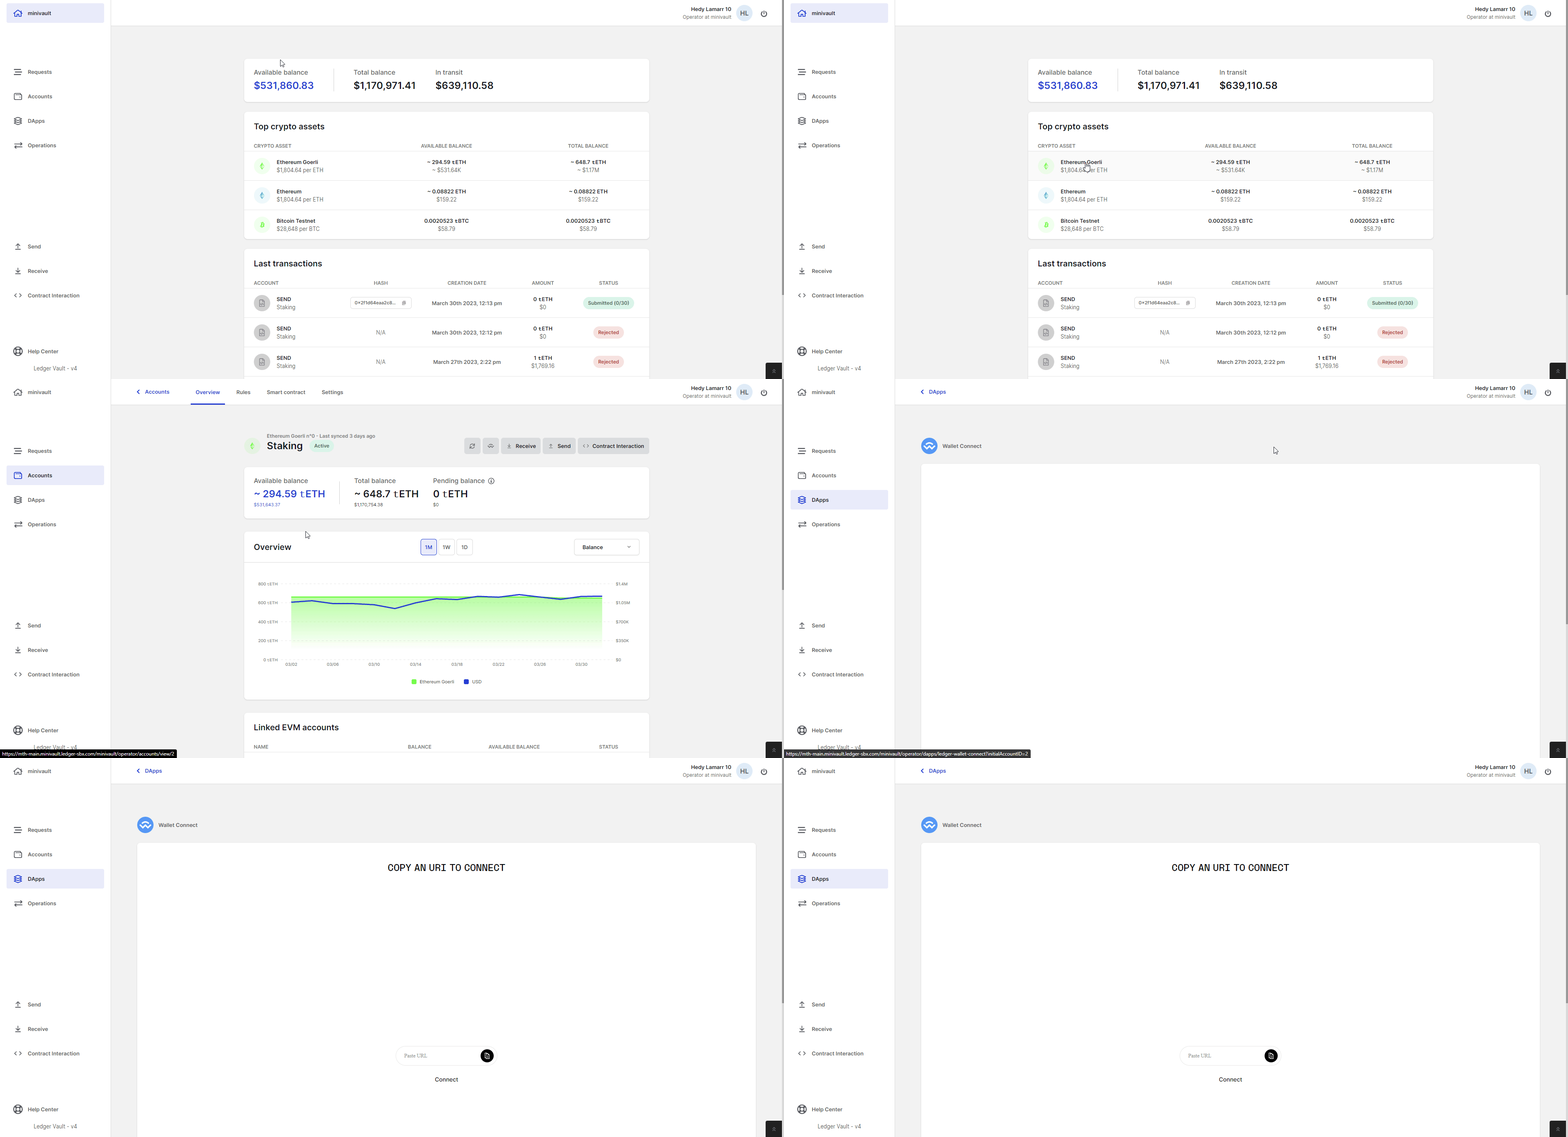
-
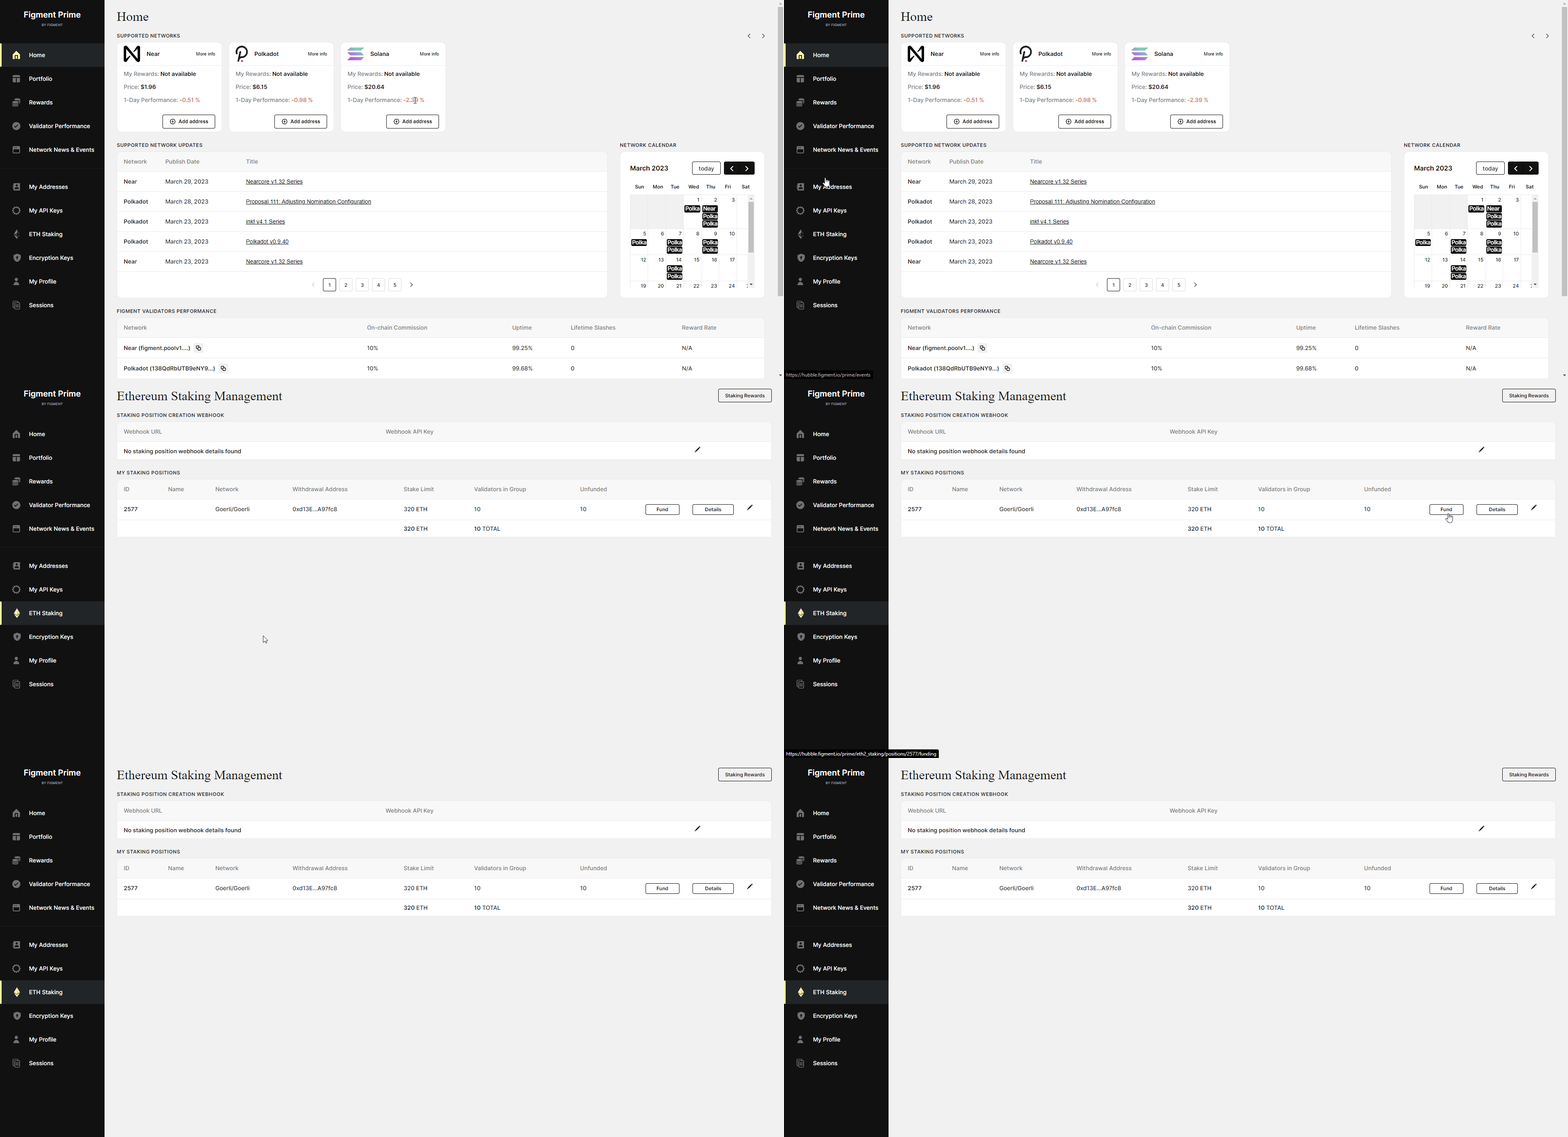
In a separate browser tab, log in on your
Figment Prime dashboard
, and head to the
ETH Staking
section. Note that you need to have at least one
provisionedvalidator in order to start staking. You can request validators directly in the Figment Prime UI or via API. To learn more about Figment's validators, you can head to their official documentation .
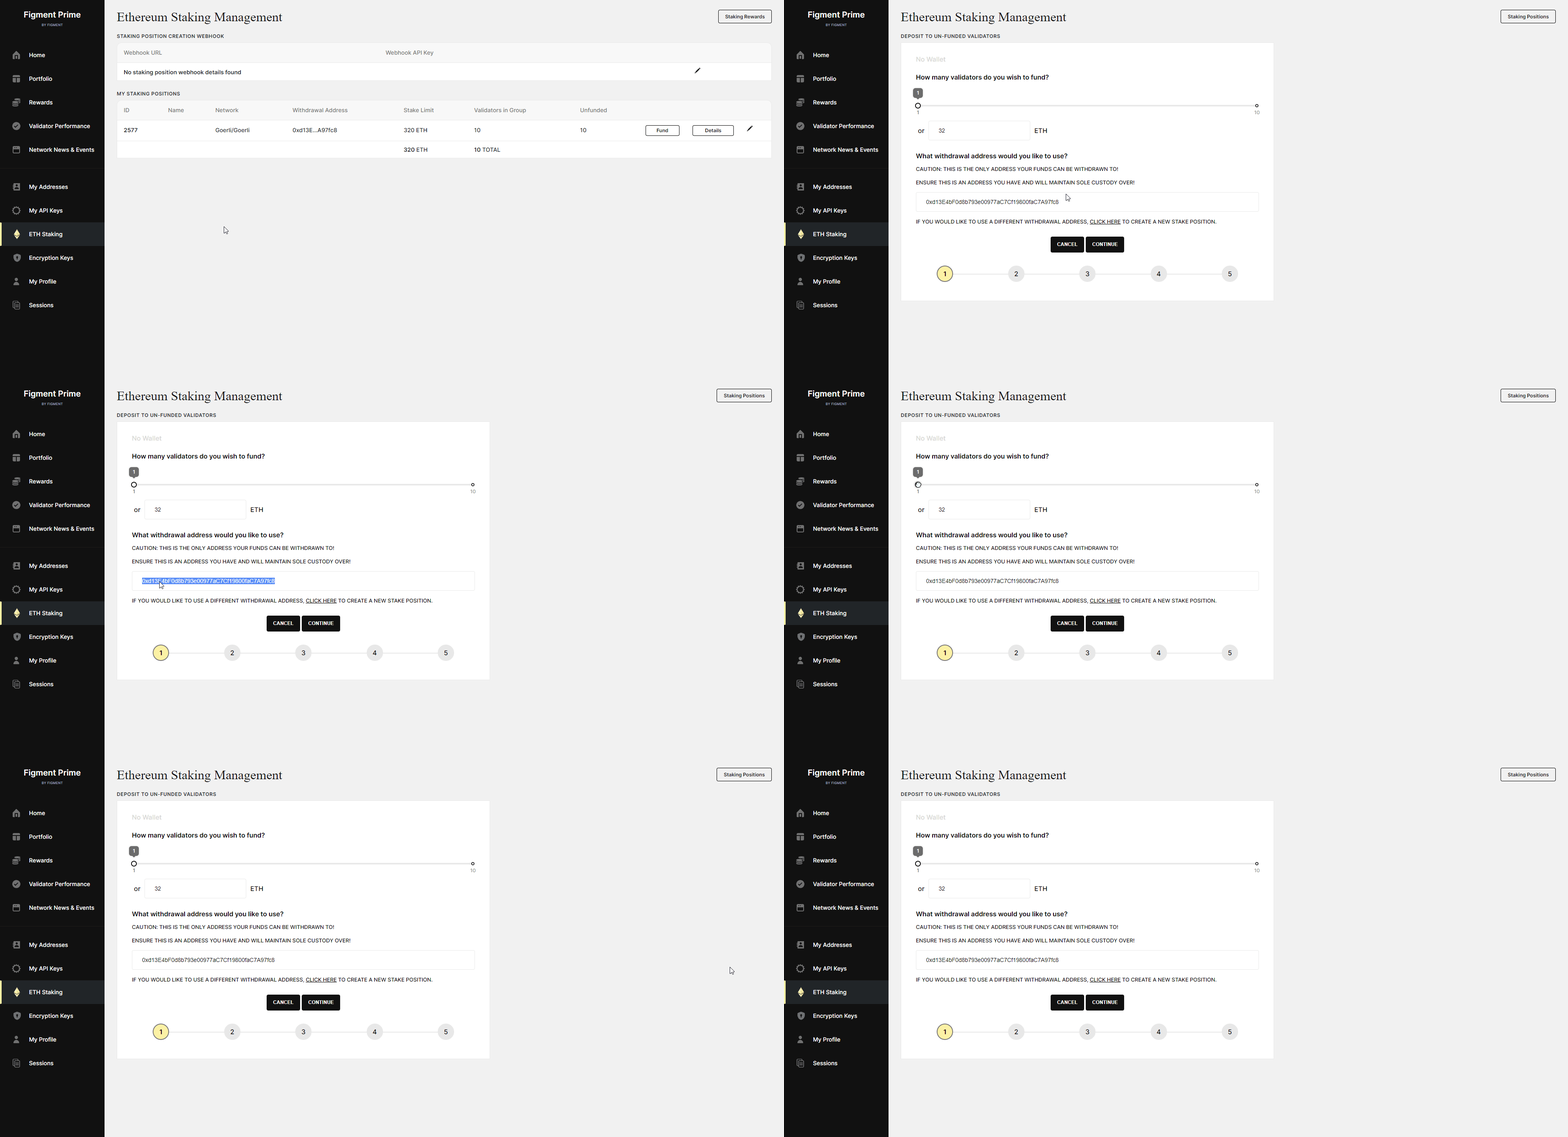
- Click on the Fund button. Select the amount that you wish to stake (or, alternatively, the number of validators to fund using the slider). Enter your withdrawal credentials (your Vault account address that will effectively control your staking positions).
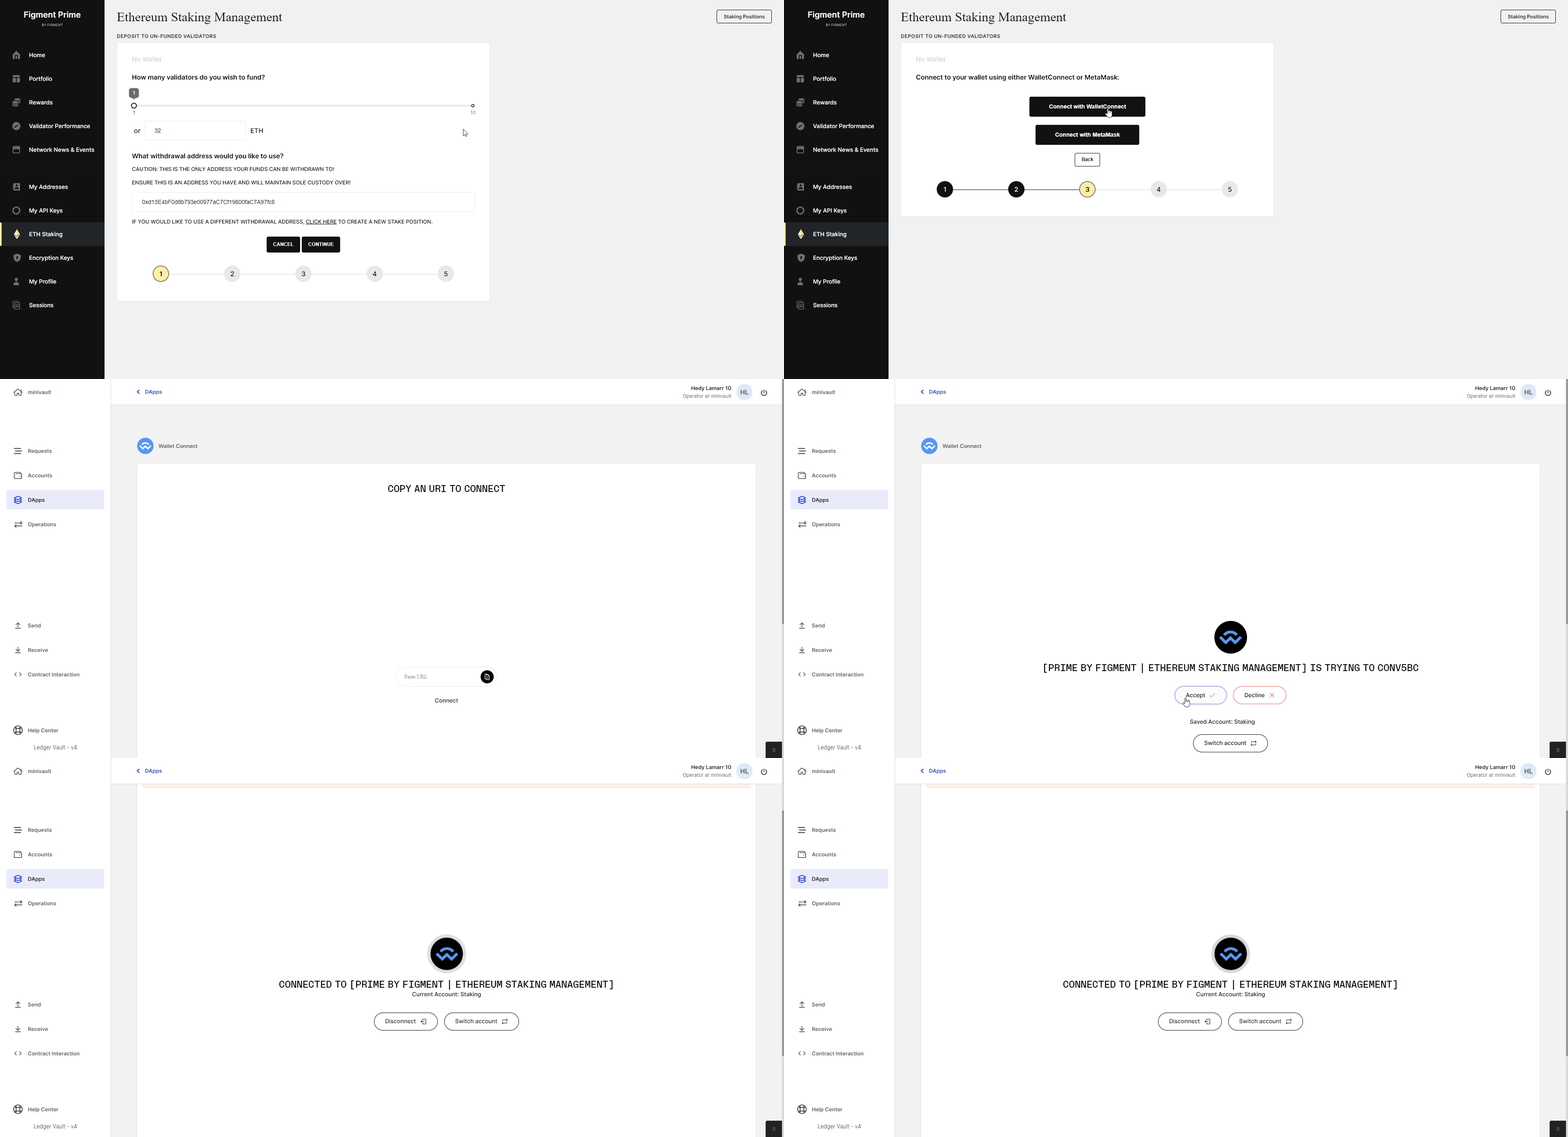
- Click on Continue, and confirm your withdrawal credentials. Then, select the Connect with WalletConnect option and copy the QR code presented on your screen. Paste it in the WalletConnect application of your Ledger Enterprise account. This will connect your Staking account to Figment's application, so that you can validate and sign the staking transaction.
- Go back to your Figment Prime dashboard, review the details, and click on Submit transaction . Head back to your Ledger Enterprise interface, and wait until you see a transaction modal pop-up. Review the details as well, and click on Confirm .
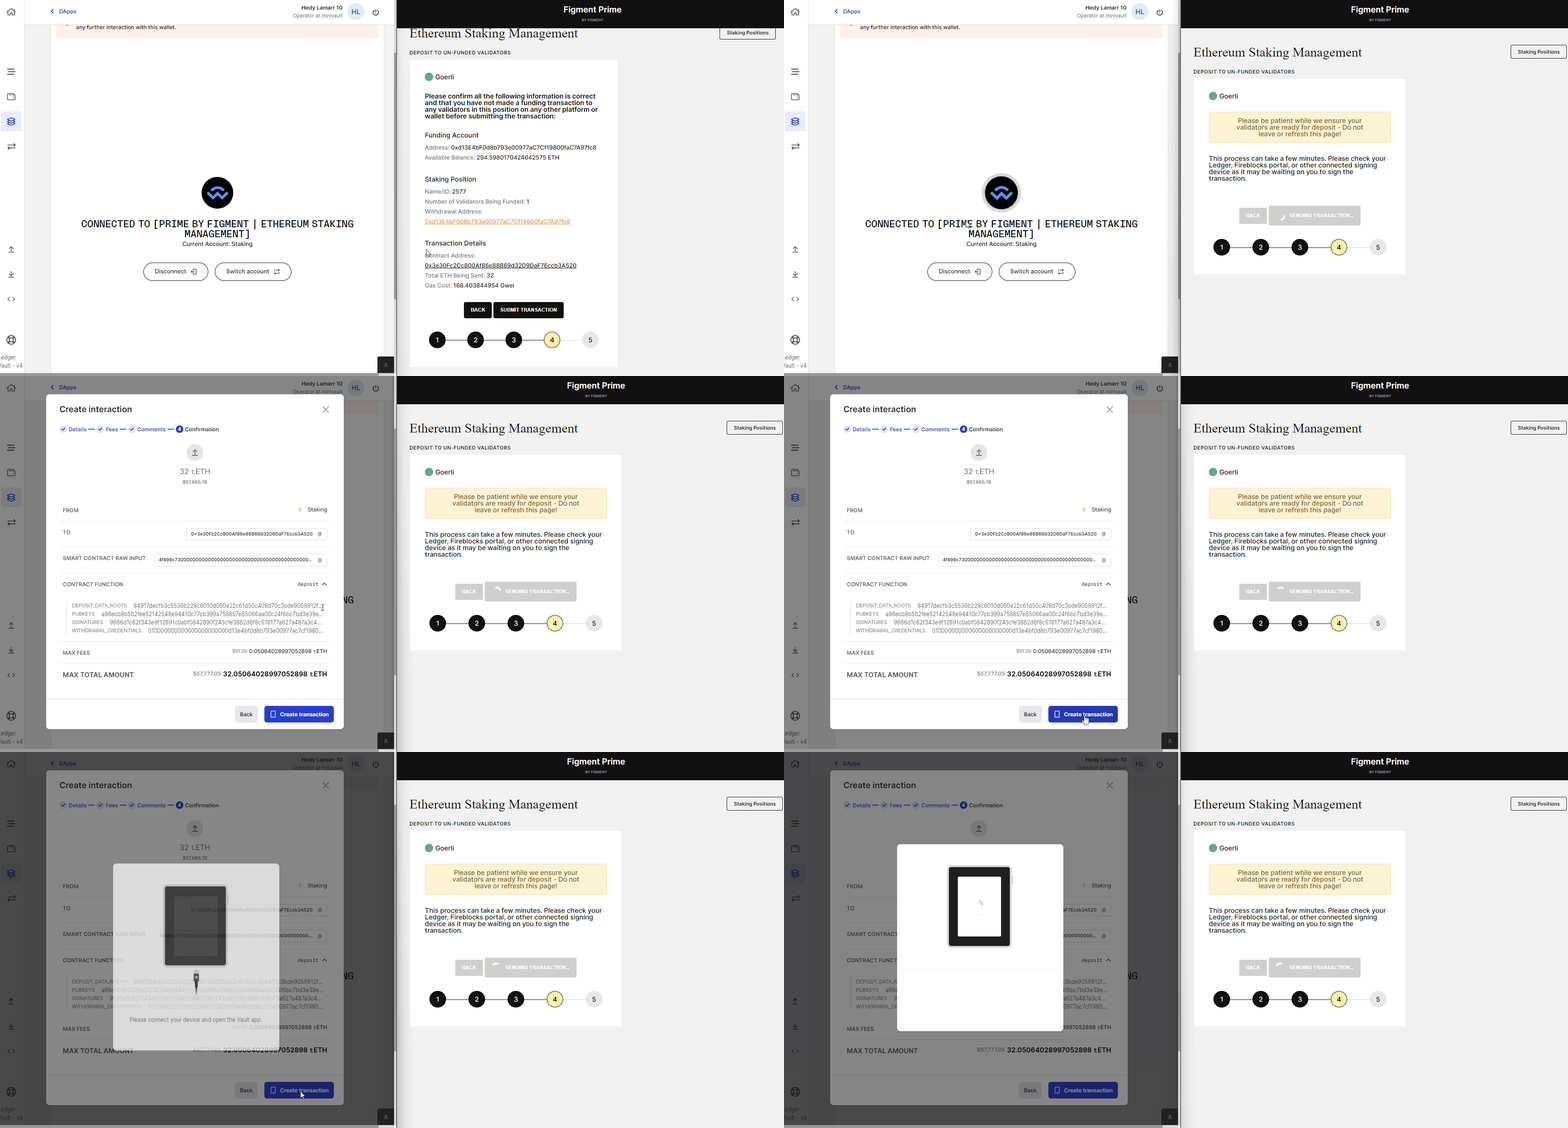
- You will then be prompted to review the transaction on your Personal Security Device . If the information matches your intent, approve the transaction, and it will follow the ususal governance approvals as defined in the Smart Contract rule. Once all approvals have been gathered, the transaction will be signed and broadcast.
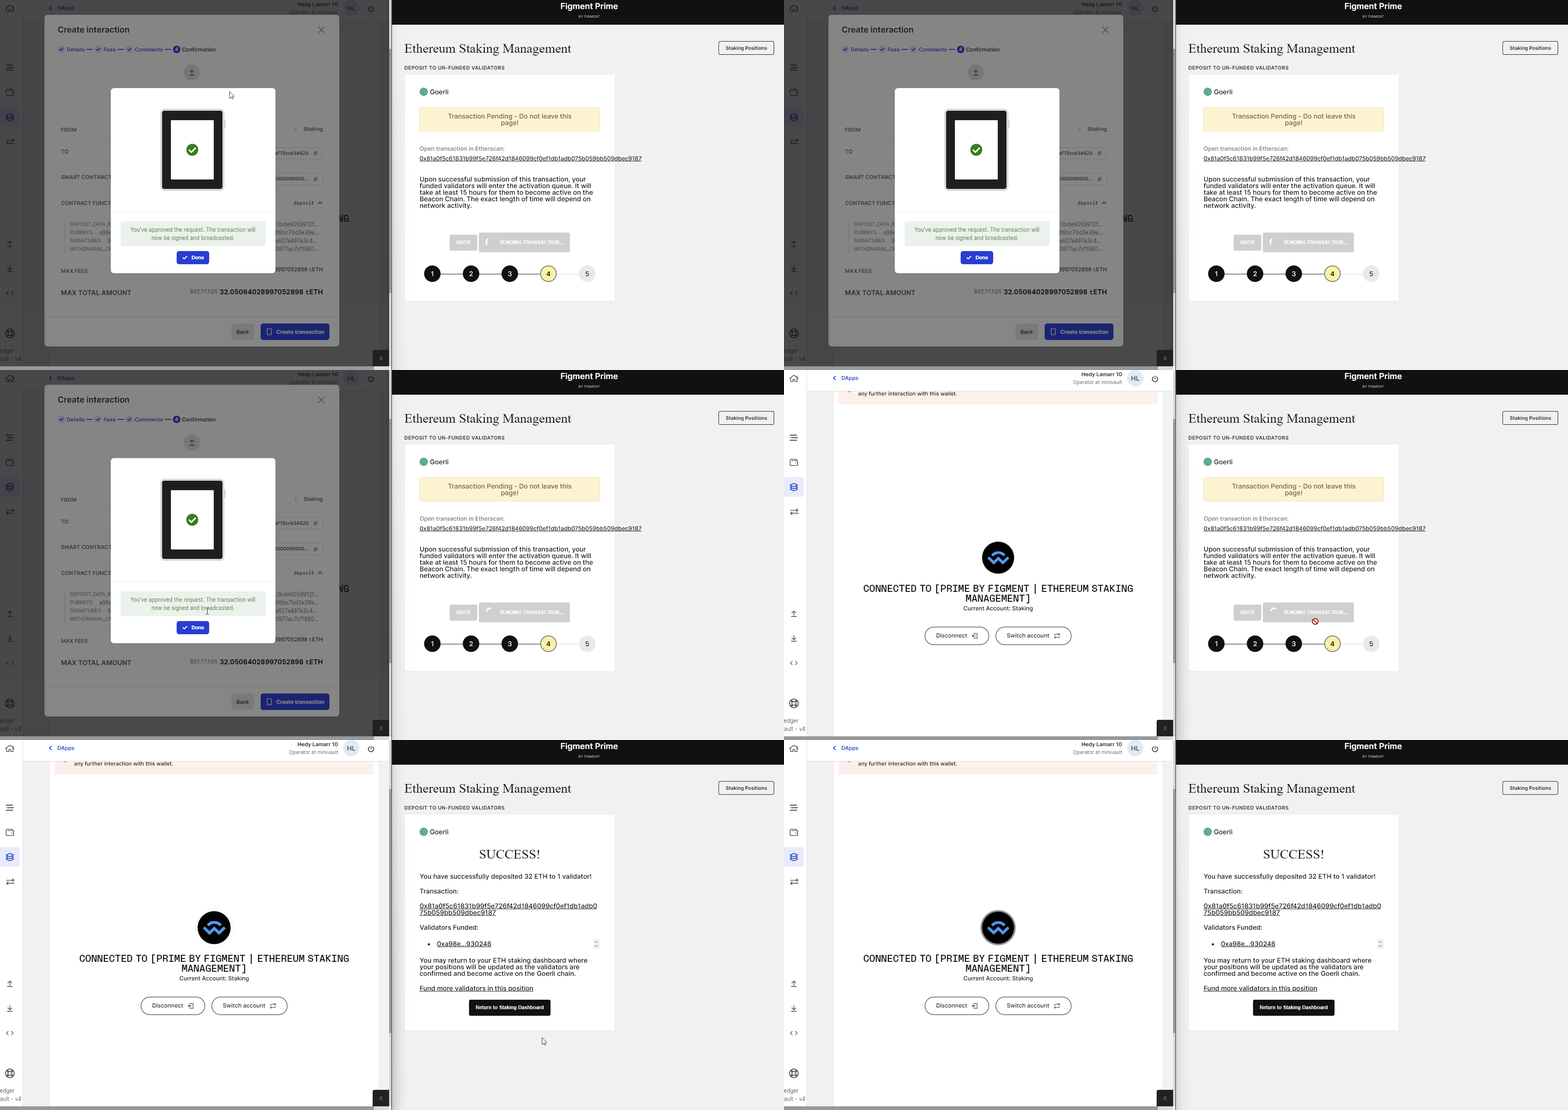
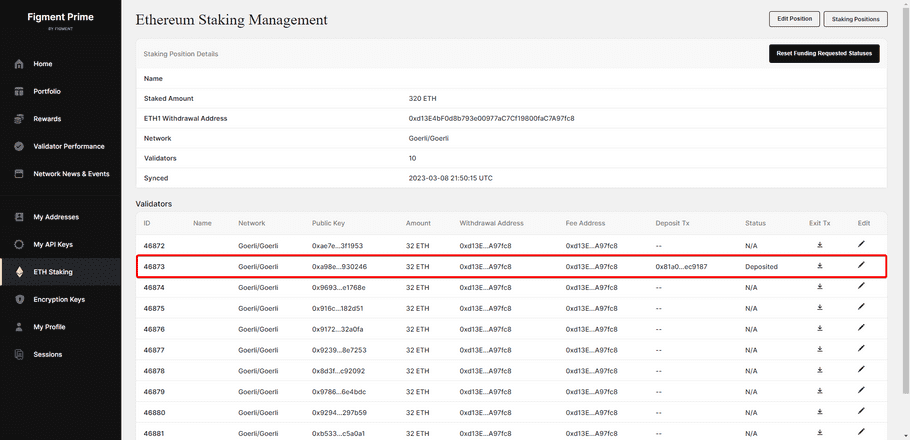
Once broadcast, you should see a Success message on your Figment Prime dashboard, meaning you have successfully performed your staking operations! You can review your newly deposited validators in the Details view.
Monitor your stakes & rewards
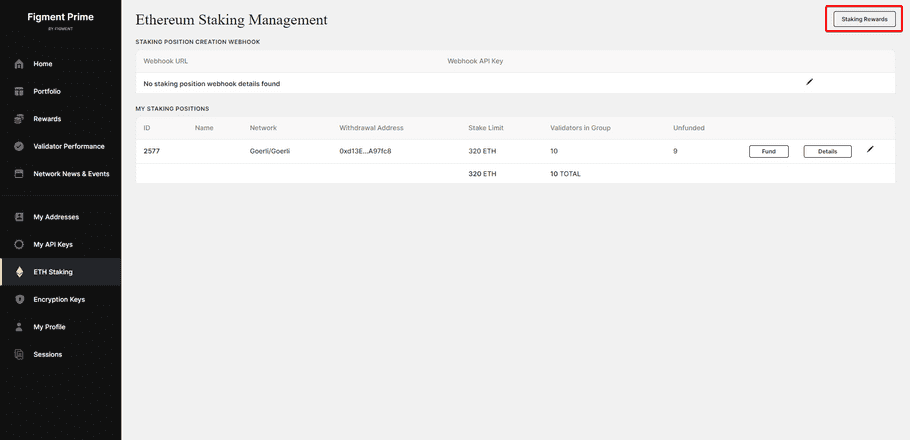
To monitor and track your stakes and their associated rewards, simply head to the Rewards section on Figment Prime's app. You will be able to visualize all the active stakes for a given Vault account, as well as their generated rewards. As per protocol specs, you should be able to withdraw part of your rewards as soon as they are granted.
Step-by-step guide: Stake with Figment via API
You can find the relevant API tutorials to stake with Figment programmatically in our API documentation. You can also head to Figment's official API documentation for more information.